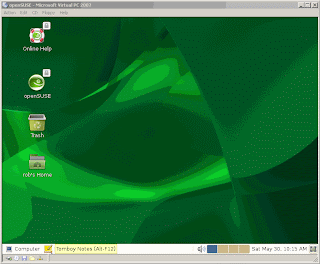
There has been a lot of interest in my post about installing openSUSE on Virtual PC 2007 so I decided to post a walk through for openSUSE 11.1. Here it is in all its glory.
What you will need:
- A PC running Virtual PC 2007 - Virtual PC 2007 is available free from Microsoft here.
- Either an installation DVD or LiveCD for openSUSE 11.1 - available free here. I use the DVD to keep the actual install time down.
- Either a DVD writer or some software that lets you mount an ISO file. I use Power ISO - available free here.
Let's get started:
After downloading all your required software we need to mount the ISO or burn it to disk. I am going to mount it using Power ISO.
Once you have the ISO mounted to a virtual drive you need to setup a virtual machine. Open Virtual PC 2007 and click New.
Name your VM and browse for where you want to save it and click next. Note, this is not where the virtual hard drive will be saved so a place like the desktop in fine.
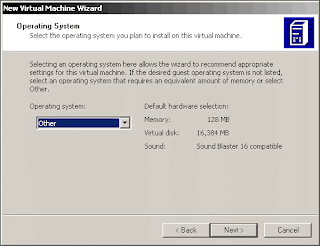 Select Other for the OS and click next.
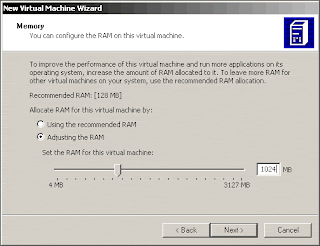 Chose the amount of RAM for the VM. I went with 1GB for improved performance within the VM but the recommended 128MB would be sufficient. I like to keep this around 1/3 of my total RAM or less.
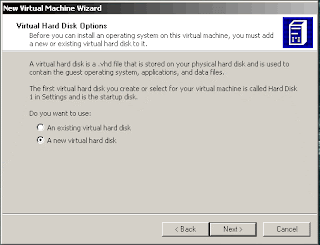 Select new virtual hard disk and click next.
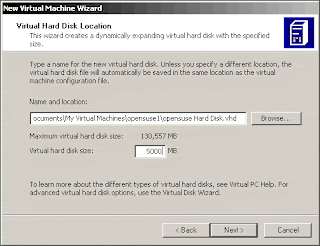 Select the size and location of the virtual hard disk. I would recommend 5GB for the default load of openSUSE. This will allow you to install all of the common packages and features.
 Select Other for the OS and click next.
 Chose the amount of RAM for the VM. I went with 1GB for improved performance within the VM but the recommended 128MB would be sufficient. I like to keep this around 1/3 of my total RAM or less.
 Select new virtual hard disk and click next.
 Select the size and location of the virtual hard disk. I would recommend 5GB for the default load of openSUSE. This will allow you to install all of the common packages and features.
Once you click next you will see a summary of your virtual machine and then click finish. Virtual PC 2k7 will then create your new virtual hard disk and you will now see your VM in the list of machines in the Virtual PC console.
Select your VM and click Start and a new window will open and your VM will begin to boot. Click the CD menu on the VM and select the drive that you mounted your ISO to. Once you have selected the drive the VM should start to load the openSUSE installer. This might take a little while so be patient. Eventually you will see the welcome screen below. Also, in case you are unfamiliar with Virtual PC and having trouble with switch mouse control between the host and guest OS the right ALT key is the default host key. Pressing the host key will allow you to move back to the host OS.
Select your VM and click Start and a new window will open and your VM will begin to boot. Click the CD menu on the VM and select the drive that you mounted your ISO to. Once you have selected the drive the VM should start to load the openSUSE installer. This might take a little while so be patient. Eventually you will see the welcome screen below. Also, in case you are unfamiliar with Virtual PC and having trouble with switch mouse control between the host and guest OS the right ALT key is the default host key. Pressing the host key will allow you to move back to the host OS.
This is where we need to enter our boot options to ensure openSUSE loads properly. Select the Installation option from the menu and a Boot Options field should appear at the bottom of the screen. It this field enter noreplace-paravirt i8042.noloop clock=pit and then press enter.
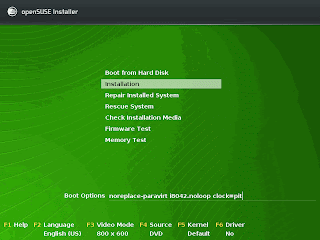
For a more detailed explanation on what these options do see my other post here. After a moment or two you should see the screen below.
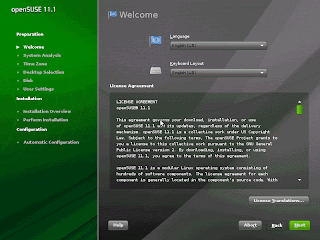
Read the license agreement and click next.
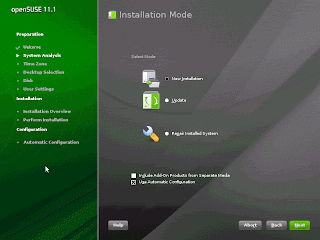 The default selections here are fine. Click next.
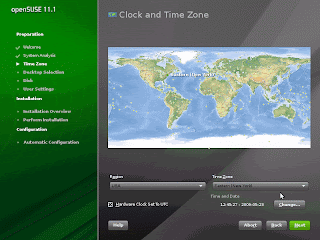 Selected your time zone and correct your date and time if needed. Depending on your system you may need to deselect the UTC option but for most machines that is fine.
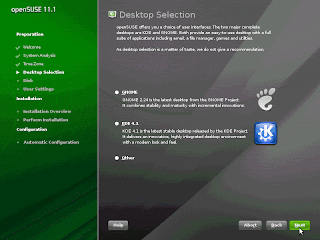 This is the desktop environment selection screen. GNOME and KDE are the two major Linux desktops. It is a matter of personal preference really but if you have never used Linux before I would suggest GNOME. It is the most Windows like of the two in my opinion. You can also setup a second virtual machine and run both until you find one you like best.
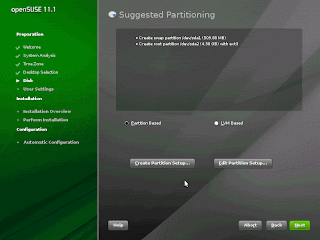 Here you select the file system scheme for your VM. If you have no Linux or UNIX experience I would suggest using a partition based setup for the familiarity to Windows. But I prefer LVM for its flexibility. Here I choose the partition based setup for simplicity and since this would be more familiar for most users.
 Enter your name and desired username and password. Unless you are an experienced Linux user I would leave everything else as default. You might also notice that a window will pop up saying something about loading cracker-lib. This is openSUSE checking your password strength. If you use a dictionary word or some other overly easy password it will notify you. I really like this feature, which is in many other Linux distros as well. When you are all done click next. You will be shown an overview of the installation options you have selected and prompted with any issues with the install. Here you can go in and change the default packages that are installed but I would recommend leaving them at default for a new user. And finally...
 The install might take a while so be patient. You do have the option of clicking the Details tab and watching the install work. After a little while the install will finish and begin the Automatic Configuration. Once this is done you should see this screen.
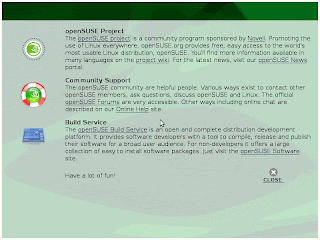 Browse the links on this page or click close to start using openSUSE 11.1!
This is a pretty quick and dirty walk through but it should give you all you need to start using openSUSE on Virtual PC 2007. If you have any questions please leave them in the comments and I will do my best to answer them.


1 comments:
I gave up on OpenSuse 11.1 with Virtual PC 2007. The boot options (noreplace-paravirt, etc.) got me further, it finished the install, but froze when trying to reboot. I switched to VirtualBox.
Post a Comment